
As an Amazon Associate I earn from qualifying purchases.
With your best belt sanders and some other materials, you can carry out simple hull repairs. There’s nothing worse than spending a day cruising on the shoreline and accidentally scuffing the fiberglass reinforced plastic hull on sharp rocks hidden below the waterline. You don’t mean for it to happen and dread seeing the extent of the damage because you know, potentially, it’ll cost thousands to repair. It’s a nightmare and sometimes, even a trusty belt sander won’t be enough to solve the problem.
Fortunately, there are ways for you to repair a fiberglass boat hull without the need of a professional boat restorer. As difficult as it sounds, it’s not impossible to attempt and get right, as long as you know what you’re doing. And, it’s a simple way to save thousands. Of course, some repairs are more complex than others and fiberglass can be trickier than other boats. With wooden boats, scratches and dents can be repaired far easier but with fiberglass, you have to be extra careful as it can be damaged beyond repair.
With a little DIY help, you can deal with pesky boat repairs and these fiberglass repairs tips may just help you too.
Materials and Tools Required To Repair Fiberglass Boats
While every repair is different and may require additional equipment or tools, here is a list of some of the basic materials and tools required to repair fiberglass boats.
- Belt Sanders And Sandpaper
- Rotary Tool
- A Heat Gun
- Safety Glasses And Gloves
- Wax
- A Get Coat
- Get Coat Reducer
- Disposable Spray Gun
- Acetone
- Buffing Compound
- Powdered Fiberglass Filler
Having these tools and materials at the ready – before you start any repairs – is essential to ensure all repairs go smoothly.
Spotting Leaks in Fiberglass Boats
Sometimes leaks spring up from nowhere, with no warning or indication there’s a problem. The truth of the matter is that unless you’ve had a bad collision recently, the hull seems perfectly intact. Often, leaks are caused by tiny holes after a minor collision (probably from a rock or object underneath the water) and while it’s not immediately noticeable, it slowly gets worse. It’s likely the first time you see any signs of a leak are when it starts spurting in – probably while you’re in the middle of the lake.
It’s pretty scary and you’ll be left confused about how it happened. That’s why you have to maintain your boat and conduct regular checks. It’s essential and something most neglect. However, if you want to spot a leak in a fiberglass boat, it’s what you need to do before it gets any worse.
How To Tell Your Boat Has A Leak?
The majority of leaks occur after a minor bump or from general wear and tear, and while some leaks are easier to spot, many won’t be. Fortunately, you don’t have to wait until your boat fills with water to know there’s a problem. Have you noticed paint breaking away from the hull? Has the paint started to bubble on the interior of the boat? These are signs the boat has a leak somewhere. It’s the same when corrosion has formed on metal fixtures and fittings. Any discoloration may be a sign of a leak.
As said above, you need to conduct routine checks to ensure your boat’s in the best condition possible. Inspecting it once a month may enable you to spot the signs of a leak and repair it before it gets worse. Prevention is sometimes the best cure of all.
Locating the Leak’s Source above the Waterline
Identifying the source of the leak is essential and not as difficult as you might think. There are lots of ways to locate where the leak is coming from. Here are a few methods you might want to consider trying:
- Spray Water Onto The Boat: At the shoreline, use a hose and spray the interior with water. A friend can be on the outside watching for signs of water leaking out. If they spot the water springing out from a specific area then you know where to concentrate your efforts on. Spotting the hole shouldn’t be too much of an issue, not when you know the general area it’s in. However, you don’t need to drench the entire boat with water, a few light sprays should be sufficient enough.
- The Baby Powder Trick: If you don’t have a hose available, you can opt for the baby powder. It’s not as crazy as it sounds and can be an excellent way of finding the leak’s source. To do this, you need to get a can of compressed air and sprinkle baby powder to the exterior (outside) of the boat. Then, use the compressed air to blow onto the exterior. If there’s a leak somewhere in that area, the baby powder will be disturbed. Of course, this is a bit trickier to do than the hose but can be just as effective in sourcing the leak.
- Ultrasonic Leak Detector: These detectors are fantastic because it’ll help locate the leak in minutes. However, this is a little more up-market and a little more expensive too but is well worth it if it means identifying the leak. The detectors work with sound waves that are transmitted throughout the boat. If there’s a leak it should be able to detect it and it’s a pretty smart way to do so.
Finding a leak above the waterline is a lot easier than you think and the above methods should be enough to source the leak.
Fiberglass Boat Repair Tampa Florida – (813) 886-2084 from Frank Ferrer on Vimeo.
Locating a Leak’s Source in the Hull of the Boat
Unfortunately, leaky hulls are trickier than leaks above the waterline; although, there are still ways to source a leak. You may want to consider trying the following steps:
- Dry the Bilge: Get your bilge pump out and dry the entire boat. This is essential to locate any leaks. Of course, if there’s a gaping hole in the hull then you won’t need to do this as you’ve found the leak. Unfortunately, it’s not always as clear-cut as that. Once you’ve dried the bilge, take a towel and mop up any remaining water in the boat.
- Scout with a Flashlight: When you’re dealing with fiberglass you need to look for any potential signs of damage. So, take your flashlight and go over every inch of the hull with it and if there is a leak, you should, hopefully, be able to spot it. This might also be a good time to check on the overall condition of the hull as minor repairs may be required, depending on its condition.
- The Rub Test: It’s not always clear (or obvious) where the leak has started from and while it’s frustrating, don’t give up. You want to look very closely at each individual bilge fitting. Wipe them down with paper towels and rub your finger or hand over it. You might actually be able to feel the water coming through and that’s usually where the leak is located, if not in the general area. Remember, leaks can be very minuscule so it’s not always going to be visible with the naked eye.
- Dig Deeper: If you cannot locate the leak or you can’t find the gap it’s coming in then you have to investigate further. Sometimes, the liner of the hull may hide the problem so you need to explore this area as well. What’s more, closed compartments may also hide a few secrets so you need to explore all hidden areas of the boat to find the leak. If these areas are taking in water, use a pump to remove it and, if possible, find the hole.
- Investigate Out Of The Water: If you really can’t find the source of the leak but the water’s still coming in, you have to remove the entire boat from the water. While you don’t want to do this you need to locate that leak. Don’t worry about water being in the bilge as it might help you source the leak. Sometimes, you can see where the water is draining out from and it’s likely to show the source of the leak.
Spotting and locating a leak is important and not something that should be rushed.
Should You Choose Professional or DIY Fiberglass Hull Repairs?
Fiberglass reinforced plastic must be properly repaired and isn’t as tricky to work with as you might think. When the leaks have been found, you want to fix the boat as quickly and effectively as possible. You’ll need tools such as a belt sander, to do the smallest of repairs but the best belt sanders will make the overall job easier. While you don’t want to handle major hull repairs, it’s essential to understand how to deal with emergency repairs.
There are lots of ways to repair boat hulls in and out of the water. Learning a few things may just help you one day on your boat.
How to Tell If Emergency or Long-Term Repairs Are Needed?
Spotting a leak on dry land is one thing, spotting it while you’re in the middle of a lake leaves you at panic stations. You don’t, however, want to panic in this situation because you could make things worse. Instead, you have to calmly assess the situation and take decisive action. A temporary or emergency repair is needed to ensure you get safely back to shore. It may also avert total disaster because a minor leak can turn into something much more serious and even sink the boat. An emergency repair is essentially used as a temporary band-aid until you reach the safely of the dockside.
Long-term repairs aim to fix the problem permanently. While there is more work involved, these repairs can be more effective to stop and prevent a leak from returning. The reality is long-term repairs are necessary but not always possible to carry out on the water. If a leak occurs when sailing, an emergency or quick repair is required until you get back to shore. Once on dry land, you can carry out a long-term repair.
Dealing With Emergency Hull Repairs
Emergency repairs must be carried out with immediate effect. If you have to make an emergency repair, it’s because there’s a visible leak that’s causing the boat to take on water. These repairs may slow the leak so you can return to shore in one piece and not have to swim back. It’s essential to deal with emergencies as soon as they occur.
- The Collision Mat
One option to consider when carrying out emergency repairs is the collision mat. In simple terms, this is a very large tarp – also heavy-duty – which can be put underneath the boat. It will cover up the holes causing the leaks in the hull and may even stop the leak or slow it down. You can then use the bilge pump to remove the water.
Unfortunately, every emergency onboard is different. Some repairs can be carried out safely while others can’t. The reality is that minor repairs, such as using the collision mat, might just enable you to patch up the leak and return safely to shore where further repairs can be safely carried out. Emergency repairs are only designed to be temporary.
Can Fiberglass Boats Be Repaired With Flex Seal?
Flex Seal is hugely popular and it may even be possible to fix a minor leak onboard. Unfortunately, this is not a long-term repair solution. Flex Seal, while can be useful for minor leaks, is a temporary fix. While it’s good to have around in an emergency, it isn’t going to solve all of your hull problems. You’ll have to carry out a full repair to ensure your boat is safe to use.
Which Is Better – In-Water or Out-Of-Water Repair?
You have the option to make long-term repairs in-water and out-of-water. Here is what you need to know about them both to find the best option for you.
- Making In-Water Repairs
In-water repairs are ideal if the leaks are above the waterline. For instance, if your window frames have cracked and are letting in water, caulk could be added to plug the leak. It’s a quick repair that shouldn’t cause too much trouble for you. However, if you’re using caulk, always follow the instructions. Of course, there are some repairs you can’t make in-water, especially when it’s to the boat’s hull. While you might prefer to opt for in-water repairs, it’s not always possible.
- Making Out-of-Water Repairs
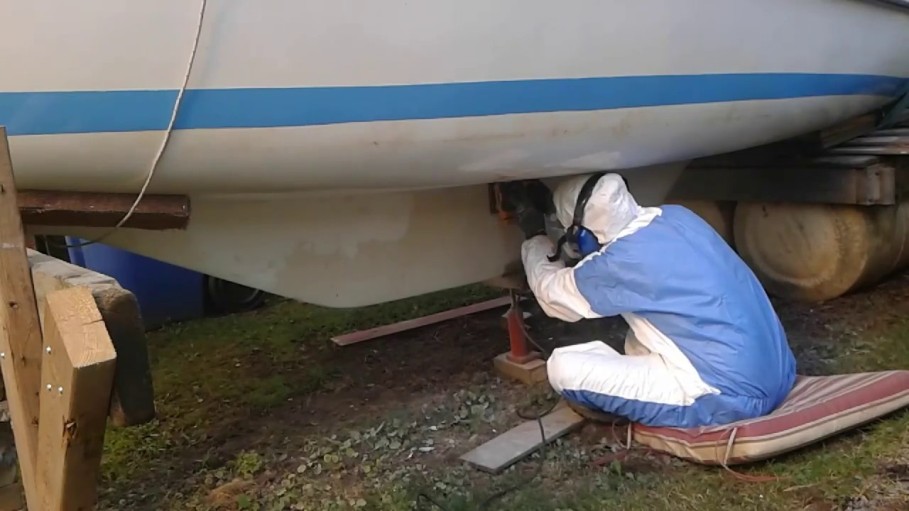
While you have to spend time removing the boat from the water, it’s sometimes a necessity to carry out effective long-term repairs. When leaks occur under the waterline, the boat needs to be removed from the water. Some repairs, fittings, for example, are fairly minor but these have to be replaced and should be done on dry land. Also, the sealant must have ample time to dry.
If there’s a hole in the fiberglass hull you’ll need to make extensive repairs. This can be done by a professional or yourself. Again, it’s only possible on dry land.
How to Make Out-of-Water Repairs
Dealing with out-of-water repairs isn’t impossible but must be done carefully and precisely. You may want to consider the following steps to carry out your repairs. Here are some of the tools you’ll need:
- Acetone
- Buffing Compound
- Rotary Tool
- Safety Glasses and Gloves
- Sandpaper and Sanding Block
- Gel Coat
- Powdered Fiberglass Filler
- Get Coat Reducer
- Wax
- Disposable Spray Gun
Starting the repairs is daunting but with a little know-how, it can be easy. Here are a few steps you could use to fix small holes or gouges in fiberglass boat hulls.
- Clean The Boat Thoroughly
Anything that doesn’t need to be on the boat should be removed and the entire boat washed from bow to stern. You want to know the extent of the problems and, sometimes, dirt and grime hide a few secrets so it’s essential to wash the boat. It shouldn’t take too long to do this, though. If you notice any dents, dings, scuffs, or holes, mark them with tape; this will ensure you don’t miss any repairs out. And don’t forget to remove decals or graphics from the side of the boat.
- Round The Edges
When there are deep gouges in the fiberglass reinforced plastic, it’s essential to fill them in and sand down. You’ll want to use the rotary tool and round the edges so you’re left with a groove that’s u-shaped. This will remove the sharp edges.
- Sand Scratches
If the fiberglass has mild scratches to it, it’s best to sand them away. You may want to start with 80-grit sandpaper before moving onto 150-grit and finishing up with 240-grit. This will, of course, depend on the depth of the scratches. You have to be careful when sanding any surface.
- Create A Paste With The Gel Coat and Fiberglass Filler
Mix the gel coat with the powdered fiberglass filler. It will create a thick paste. You should follow the instructions with these items though as every filler and gel coat may differ. When the mixture is ready, apply to the gouges. It doesn’t matter if you apply too much, you can always sand these areas later.
- Cure Then Sand
Once the mixture has been applied, it must cure. You need to give it ample time to cure, possibly two hours, then, use 80-grit sandpaper and sand it.
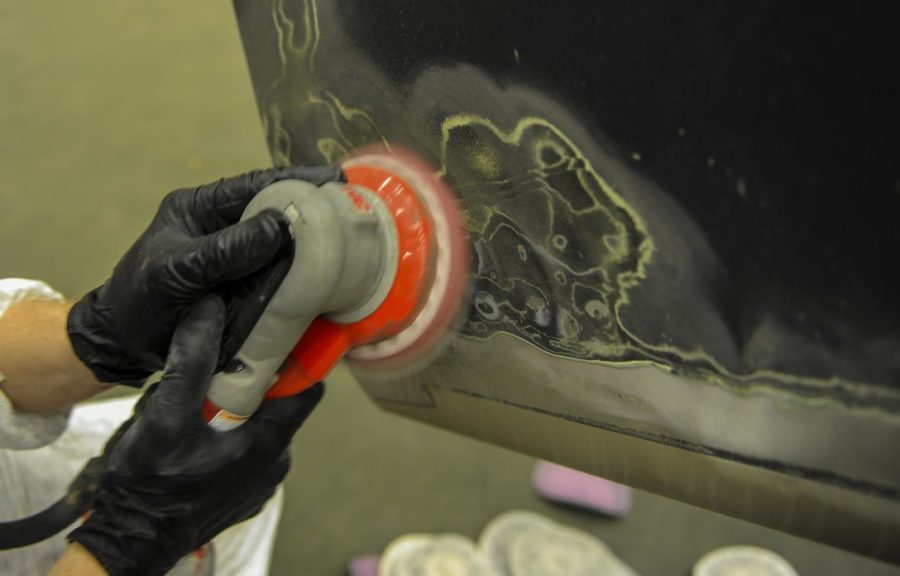
- Spraying and Sanding
Mix the gel coat reducer and coat powder together and fill the spray gun. You can forget the fiberglass filler for this part but ensure you follow the directions for the gel coat reducer and powder. Then, spray the mixture onto the area you’re repairing and let the gel cost to cure. Once it has cured, you can sand with 600 or 800-grit sandpaper. 1200-grit sandpaper could also be used to improve the finish, but this is entirely up to you.
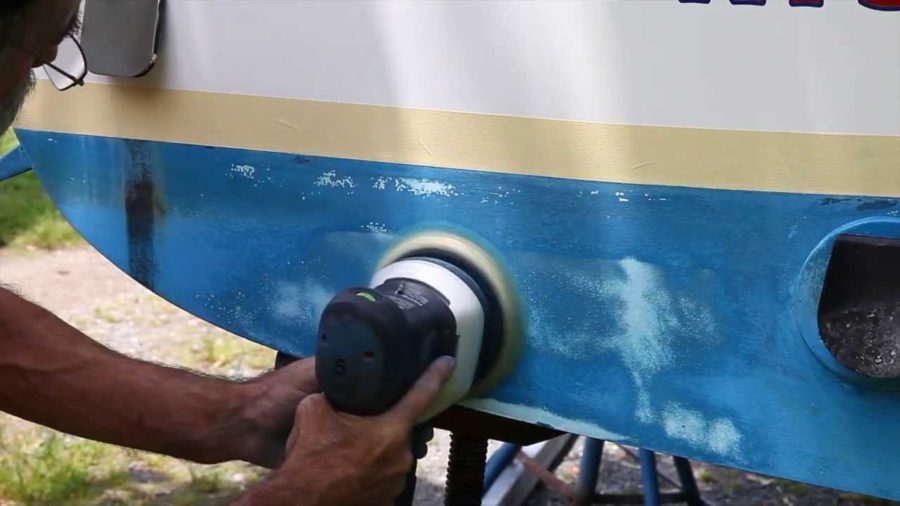
- Buff The Gel Coat
Start with a small section and buff the area. You can continue until completely finished; however, use a medium pressure setting with your buffer. This needs to be done carefully. After this has been done, you can apply wax to the boat.
Good as New
Fiberglass reinforced plastic isn’t as difficult to repair as you might think but does take a lot of hard work and determination. With the right tools, like belt sanders, you can make simple repairs. Fiberglass hull repairs are a nightmare but minor gouges or leaks can be easily resolved, see more how to do it with the best belt sander: https://www.stoneycreekwoodworks.com/how-to-guides/
Amazon and the Amazon logo are trademarks of Amazon.com, Inc, or its affiliates.


